Table of Contents
and quick links to features, modifications & usage
Find & Choose your best daypack:
I. General: features & modifications
a) IMO, no perfect daypack.
b) Beware manufacturer's hype.
c) Research/Purchase Strategy.
II. Daypack Key Functions:
A. Comfort.
B. Security: 2 Security Goals:
1. NOTE: Luggage Theft Risks.
2. My Security Strategy.
C. Quality materials: fabric, etc.
D. Multi-functional.
E. Multi-day capability.
III. Exterior features & modifications
A. Front: Compartments, etc.
B. Sides: water bottles
C. Rear: harneses, etc
1. GENERAL:
... my ideal daypack’s features & modifications
Purpose of this blog is to give you the most important daypack features & modifications I evolved over 34 years so you can wisely choose your daypack for your next 20 years at home and abroad.
After 34 yrs of hiking, backpacking & foreign travel with my old daypack, in 2013 I bought a NEW daypack for my 2014, 600 mile Camino de Santiago trek from Pied de Pont, France across northern Spain to the Pacific Ocean & south to Finistere's 'End of the World.'
Osprey Pack's "Escapist 30 Backpack Sports (Bike)” (BOT: 6/17/13, to hike Camino de Santiago in late Aug, 2014.)
Note: I am not pumping Osprey for profit, but rather because I relied on it for 600 miles across northern Spain’s Camino de Santiago trek and all of my foreign travel after that. I have no idea what its quality or features are like today.
Historically, an authentic Camino de Santiago experience IMO requires you ...
1) to walk unaided the entire route to Santiago de Compostela’s main square (Praza do Oradorio) and step on Camino’s embedded bronze plaque in front of the cathedral, and ....
2) to carry what you need on your back
While you will sleep & eat in various monasteries, nunneries & auberges, what you carry 6-8 hrs/day must anticipate weather changes, steep hills, blisters, your necessities, clothing changes, etc.
Yes, there are easier & faster means of "... doing the Camino", but, IMO, less authentic: bikes, some public transportation, main luggage sent ahead each night and the “last 100km qualifies for Certificate” (height of hypocrisy, IMO).
So, I will discuss ‘other’ manufacturers' daypack features only as they help me illustrate my Osprey daypack’s features and modifications. I leave it to you to research the multitude of available daypacks for that one that matches your usage needs.
Usage can include day hikes, cruising & bus touring &/or foreign SIT Travel including OVN & day trips, or  a mix of all, BUT, please, be flexible.
Don’t commit to just one usage because you will hopefully expand your future's horizons.
My Osprey daypack served all roles equally well. A day hike’s rain gear & snacks, 2) (OVN) overnight trips with only bare essentials for 2-3 days, and 3) long-distance airline/train/bus trips for what you want at your seat.
Caveat: you may overload airline’s carry-on daypack to avoid checked baggage weight limits.
II. Find an Ideal Daypak
A. IMO, no daypack is ideal
Today (4/18/23) I did a quick Google search for “daypacks for travel & hiking.” The price range was $35 > $300. Descriptions ranged from specious puffery to sober bomb-proof hard shells of plastic or aluminum. Digesting the entire range of daypack offerings & their features would be exhausting.
I cut to the chase when I discovered Michael Lanza’s post "THE 10 BEST HIKING DAYPACKS OF 2023” based on his years of professional testing & usage. Definitely worth your close read:
https://thebigoutside.com/gear-review-6-favorite-daypacks/
B. Beware manufacturer's hype:
Over my 40+ years of hiking, backpacking, and travel I have noticed that often new or resurrecting sporting goods companies (skis, boots, daypacks clothing, etc) initially produced a very high quality, functional product in order to establish their “excellence, highly functional” reputation. (IMO, Columbia Sports cargo shorts)
Then, begin a steady cost-saving, useful feature elimination & changes, a price-point decline in useful features, and increased specious boasting of specious proprietary techy fabrics & materials while continually increasing prices.
Ironically, even quality manufacturers often failed to disclose their very useful esoteric little features I discovered on my own. Curious 'omission' marketing.
C. 3-part research & purchase strategy.
A daypack’s usefulness,  regardless of price, is dependent on..
1) your well-thought-out features list,
& ...
2) a daypack’s variety of useful
features that fulfill those needs.
1. Review & Compare websites:
Search the internet’s product Review & Comparison websites, manufacturer’s sites, and “daypacks” sites for your background knowledge of variety & usefulness of features.
Remember each website may have a biased ‘hidden incentive agenda’ e.g.: websites often financially benefit from the advertising revenue of company whose products they review. "Not going to bite the hand that feeds"
However & again, .... see Michael Lanza's post above.
2. “specialty use” paks:
Search “specialty use” daypacks for ‘serious’ long-distance runners & bikers, mountain climbers; respected brand names (Osprey, CamelBak & OMM & Patagonia & others) trying very hard to satisfy discriminating dedicated athletes.
3.Visit daypak sellers
Visit REI or other major daypack sellers for YOUR ‘hands-on’ experience.
Remember small sporting goods departments or stores, in particular, may carry ONLY a specific brand because 1) it differentiates them from their competitor's brands and 2) it may offer THAT retailer a price discount, but may NOT necessarily offer you the best quality, features & price.
PRICE: If you are serious (you're reading this), buy what fills your needs. Divide daypack price by your years of future use; it is not an intimidating big expense. (EX: $200 / 20 yr = $10/ yr)
III. Ideal Features:
A. Comfort:
Most daypacks will be comfortable for short periods, moderate loads & tasks, but should be VERY comfortable for arduous, steep day hikes, multi-day use & foreign travel.
Anecdote: Osprey critique: In my 2015 daypack critique to Osprey company after my 2014, 600-mile Camino de Santiago trek, I wrote:
“….(daypack) seems excellent, never felt like sweat was accumulating although it must have, seldom even felt the back [of daypack ] or its weight until after 4-6 hours continuous hard walking and that could very well be my body’s age reacting.”
B. Daypak's Security:
Two Security Goals:
1. Lock all pockets.
There are ‘anti-theft’ designed backpacks* & perhaps daypacks AND specific security devices like Pacsafe’s metal mesh bag that completely envelops your bag, locks & I assume could be secured to an immovable object.
Some modern bags have integrated locks (?) which I have had NO experience with. Please research yourself, if interested.
* Travel & Leisure’s “The 6 Best Anti-theft Backpacks of 2023, Tested and Reviewed:” https://www.travelandleisure.com/style/travel-bags/best-anti-theft-backpacks
2. Attach to pipes or bed.
Unlike the skilled safecracker’s ability to steal a safe’s diamonds without moving the heavy safe itself, a thief can easily snatch your daypack from a bus/train overhead or open hostel room and be long gone before you will notice or could react.
Ability to attach daypack to an immovable object (water pipe, bed, train's luggage rack, etc.) lets you snooze more easily.
3 Primary Safety Fears
A. Stolen or lost passport: If someone steals your US passport you can neither leave host country nor enter the USA. 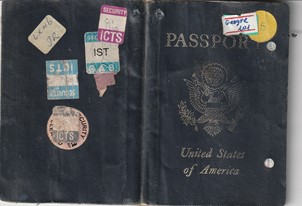
You are a person without a country, trapped in limbo, until you can reach a US Embassy for a new one. I have seen it happen.
If not in your hotel room or safe, your passport should be in a money/passport pouch around your waist under your trousers. NEVER in your luggage or daypack. Never! .... AND, always carry a copy with you.
B. Stolen US money: Perhaps erroneously, I've always believed that I could solve most travel calamities, if I had enough US money for lodging, transportation, food, etc.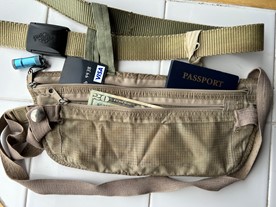
Anecdote: Hidden US Money:
So, I hid < $5000 US in my daypack and in my rolling luggage and $1000 in my money belt.
So, worst case if both daypak & rolling luggage were stolen I would still have $1000 US and my passport under my trousers. If only one piece of luggage was stolen, I would have $6000.
C. Lost or stolen rolling backpack: When train, bus, taxi, or tuk tuk traveling, my daypack was either on my back or when seated … in my hand while my rolling luggage might be stored elsewhere.
So, if for any reason I was separated from my rolling luggage, my daypack always contained what I needed to survive: clothes change, prescript drugs, US money, etc. Always have a back up; a back door.
Anecdote: Oregon Trail solo horse trip: I was riding i horse & leading a 2nd horse ... 9mi from a public road when my horse exploded under me with the lead rope caught under his tail (think a very painful 'wedgy') & then my pack horse exploded and I dove to the ground & rolled away to get away from them.
Fortunately, this fortuitously happened in an old corral of an abandoned ranch that I've stopped briefly at or they might've run far off onto the prairie with almost all my gear, bouncing off the pack horse.
Even if the horses could have run off, I wore my day pack when riding in case a similar event might happen and I was alone, a foot, on the open prairie. It contained food, matches, rain gear, etc. & a pistol for attracting attention or killing food.
When traveling I always politely refused to be separated from my daypack's immediate control.
3. My daypack security cables:
Zipper Pulls, cable & TSA lock
If you look closely at this  image at right you'll see 4 things,
1) airline cables snaking through
the stainless steel rings
attached to zipper pulls.
2) a TSA-approved cable lock.
3) cable wrapping around a black
table leg.
4) my preferred zipper pulls.
I made & carried several of these security cables of thin airline cable with end-loops.
I removed original fabric daypack zipper pulls & replaced them with small stainless steel ring on each zipper pull.
These small stainless steel rings also allowed attachment of tiny flashlights, a compass, small hand sanitizer bottle etc to any convenient zipper pull. Tiny flashlights were particularly useful on dark early morning Camino de Santiago starts.
The rings were exactly large enough to allow my airline cable's end loops to be snaked thru ALL stainless steel rings installed on ALL compartment's zipper pull rings & thus locking ALL compartments with a small TSA-approved combination lock. Some Ace Hardware stores carry cable, fittings & TSA locks.
Later I also installed, IMO, superior cord zipper pulls.
These different length cables not only secured daypack's compartments, but could simultaneously be wrapped around a hostel’s desk, bed frame or plumbing.
Anecdote: Pinyao to Xi’an night train: On a Chinese night train in the hallway outside my open compartment, I attached my rolling bag to the overhead luggage rack with the airline cable making it that much more difficult to steal.
NOTES: 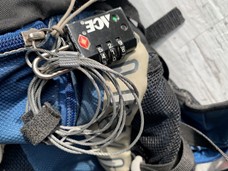
1) TSA can open TSA locks while others may not be able to.
2) One EXTRA cable & lock assembly was always coiled & secured to
a zipper pull ring for quick use.
3) Ace Hardware had: airline cable,.its fittings & TSA locks
C. Quality:
......... of fabric materials & hardware (zippers & pulls, straps).
I NEVER had to repair my daypack, but I did make MODIFICATIONS. Please see: modifications
1. Fabric quality:
Fabric quality should endure harsh conditions & long use. My rolling bag’s fabric was quality, IMO, when I bought it 25 years ago.
It has been dragged thru “Hell and Gone” literally, Europe’s cobblestone Old Town cobblestone streets, South America & Asia’s dirt roads; thru Atacama’s dry desert heat, Venice & Xi’an’s constant rain and Jackson Hole, Wyoming’s snows.
Yes, it wore thru in several places, seams tore out and wheels got wobbly, but luggage repair shop kept repairing it … adding to its “poor traveler, no valuable contents inside’ mystic.
CAUTION: IMO, beware of dubious proprietary fabric technology claims designed to disguise ordinary functionality. Remember, I used my Osprey bag daily for months on end for 10 years,. It could go 10 more.
2) Hardware Quality:
Hardware is anything NOT fabric ... like: daypack’s internal plastic back infrastructure, webbing, and plastic buckles.
I assume plastic materials are robust, webbing is usually near bomb-proof and buckles, etc may have different designs, but I never had one break.
That said, be sure to actually test the 'ease-of-use' of differently designed buckles with your eyes closed … like in a dark Camino de Santiago nunnery’s dorm room at 5:30 am.
The spade design was easy to open/close while the 2 prong male design was NOT, IMO, because difficult to get both prongs inserted simultaneously.
D. Multi-functional:
IMO, specialty daypacks for serious’ long-distance runners & bikers, & mountain climbers are perhaps the most versatile & functional daypacks. While you may never use some features, others provide unique functionalities.
Look for a Swiss Army Knife-like feature set:
1) variable sizes, locations of & flexible configuration of
compartments & pockets,
2) adjustable shoulder, waist & top-of-bag garment straps,
3) attachment points,
4) waterproof cover built-in.
5) Specialty Functions: allow for clothes layering strategy,
hidden $ pouch, secure cell phone pocket, attachment
points for compass, emergency whistle, & trekking Poles
6) and, of course, use your own imagination to modify.
Please see: modifications
E. Multi-day use capability:
I often established a base city on multi-month travels and then made multi-OVN (overnight) trips to outlying town's & sites,
Rather than haul my rolling luggage and a daypack, I stored my rolling luggage in hostel’s secure luggage storage room and took ONLY my daypack.
... with just my daypack
ANECDOTE: 5 day OVN (overnight) loop from Bucharest
... with just my daypack
In Bucharest, Romania, for several days I made a 5-day loop north thru Siaia, Brasov, Sighisoara, Sibiu & back to Bucharest with a daypack only.
1) FULL Inventory list: Full Inventory
2 )OVN (overnight) daypack inventory: OVN (overnight) Inventory

III. Exterior daypak features & modifications
A. Front: Pockets:
Front: top > bottom
1. Thin wide pocket: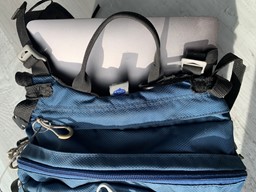
1st at top at very back (without zipper). hand-loop
USE: Not sure if this pocket intended as pocket, but iPad, Mac Air, my Emergency toilet kit slide way down so HIDDEN.
[ytlk: emergency toilet], [pplk; Resources: Travel Docs] to come.]
MODIFICATION:
Small narrow black loop (at right) is sewn at daypack’s very back at  top to allow manufacturer's small gray web loop with buckle to pass thru it & to prevent:
a) pocket from gaping open
b) MacAir from falling out inadvertently.
2. Small > Medium waterproof pouch:
2nd from top; zippered (see above image)
USE: Designed to rain-protected important documents AND anything I wanted very quick access to: TP, train ticket, pain meds, Wet Ones, Ear plugs, reading glasses, sunscreen, SDXC cards,
Waterproof pocket:
3. Large Upper Pocket:
3rd from top; zippered. [images below]
USE: Loose, bulk storage
This is a SUPER POCKET because this UPPER pocket expands to include the LOWER Medium pocket by simply UN-zipping a built-in zippered floor between both pockets. I normally used them separately for the flexibility of packing.
Please see: FULL Inventory: Full Inventory
Please see: OVN (overnight) inventory: OVN (overnight) Inventory
a) My Normal USE of UPPER Pocket: Normally I used this pocket by itself with the zippered floor CLOSED off from lower pocket for greater packing flexibility.
 Note: Left image depicts a black tripod case
  resting on the zippered floor of the UPPER pocket, while Right image shows that same black tripod case resting on the floor of the LOWER pocket, thus -- a super pocket.
b) SUPER Pocket: Is created when the zippered floor of the UPPER pocket is fully UN-zipped creting the SUPER pocket of both combined pockets for e.g. bulky, fluffy parka, etc.
MODIFICATION: HIDDEN MONEY POCKET:
A flat pocket with velcro closure was sewn onto the zippered floor between Large Upper Pocket AND Lower Medium Pocket for hiding < $5000 in US 100’s.
Anecdote: Airport police & ICE agent's search: Returning from Italy to Atlanta airport, all plane's passengers were held on the Jet Bridge (or Passenger Boarding Bridge) until, I, the last passenger, had debarked. Then, I was immediately approached by an airport policeman and asked if I was G. Scott Eaton. I responded, "Yes", he took me into custody and the rest of the passengers were released.
The airport policeman walked me directly through customs, retrieved my bags and escorted me to a long table with 2 suited ICE agents standing nearby, He promptly & meticulously went through my bags. At one point, he asked how much money are you carrying and I said less than $10,000 which is the legal limit.
He continued his search. I asked if he wanted to know where the money was, but, he said nothing even though he had his hand on the unzipped floor & the $5000 hidden in the money pocket sewn to that UN-zipped floor. WADR, I'm not bragging; just describing how well my money was concealed.
4. Middle medium, multi-pocket Compartment:
4th from top; zippered. [PIK]
USE: Loose storage & small items
My useful explanatory video: (not Steven Spielberg)
https://youtube.com/shorts/NfSU_116slw?si=TmWecLiuGrEdknqx
This compartment is superbly designed for quick access to a multitude of small items organized in separate pockets.
Medium size compartment with 3 mini-pockets
Inventory of features:
a. Dimensions
overall compartment’s dimensions: ~10” deep x 10½” wide
b. 3 smaller sub-pockets
There are 3 smaller sub-pockets attached along the compartment’s back ~ 4” below the top of the compartment.
These pockets are from L>R: 3" wide fabric, 4” wide mesh & 3” wide fabric pockets; beautifully designed to carry quickly accessible small items like a spoon, and prescription & pain drugs.
c. Attachment fitting
Centered between & above the left & middle pocket is another attachment with safety attachment fitting that I used to attach a Swiss Army knife that I have carried for more than 42 years
It is such clever features that define the bag's quality, IMO
5. Mesh pocket - on front:
large black mesh on outside of daypack
USE: Not sure of manufacturer's intent, but ideal on Camino de Santiago, to dry wet socks from last night’s wash.
Image at right: Pocket is a large black area with white paper inside.
6. Lower Small - Medium Pocket:
Please Re-read above: super_pocket
6th from top; zippered
USE: Loose & bulky item storage
7. Tiny Bottom Pocket:
7th from top; zippered (almost hidden)
USE: The yellow material is a waterproof bag designed to  fit over the entire day pack protecting it from rain, etc. It even protected extra garments I carried on top held down by MY added tie-down straps.
NOTE: 1) the white area is the 'back' of the inside of the
pocket
2) strap with buckle attaches the bag to the inside of
this pocket so everything tucks away securely when not
in use.
NOTE: Good example of …. small, but very useful quality feature.
B. Sides: right & left
1. Mesh water bottle pockets
PURPOSE: to securely hold various-sized water bottles with compression straps. Unfortunately, the manufacturer’s design for that bag did not work, but was rather inherently, dangerously useless.
Useless because bottles of any size fell out during my pre-Camino de Santiago test hikes. Dangerous because, if unnoticed, loss of water bottles across arid, uninhabited areas of Spain's Caminio de Santiago could accelerate my dehydration & its bad consequences.
To solve this POOR design, I made the folllowing modifications which worked.
MODIFICATIONS:
a. Black Stretch Webbing:
Added 2' wide black stretch webbing
 loop (just below purple arrow at right) a few inches above original mesh water pocket to tightly secure the bottle's neck which prevented the bottle from squishing out of mesh pocket which it originally did.
It worked.
b. Small cord loop for lanyard attachment:
Use: 2nd water bottle security device
1. I sewed (attached) a 1½“ paracord 'attachment loop' to the daypak ABOVE the water bottle pouch (see tip of purple arrow).
2. I tied a Jug Sling Knot bottle knot and attached to bottle neck,
Jug Sling Knot: (https://www.youtube.com/shorts/0XcY7FGuj3w)
3. Finally, I connected both with a lanyard with a small Carabiner Clip at each end. The lanyard must be long enough for you to lift the bottle out of it's pouch and up to your mouth for drinking.
Paranoid? Yes!
c. Short diagonal compression strap
A 'short compression strap and gray snap fitting (see above purple arrow) is attached to daypak which allows BAG's contents to be further compressed so stuff does move around inside bag.
Again, another small Osprey quality feature.
C. Daypak's Rear features:
Top > bottom
1. Center strap loop
......for hand-carrying bag or  hanging it on a hook.
Note: image at right shows computer sticking out of 'thin' rear pocket BEHIND the 'carry loop' to make it more visible.
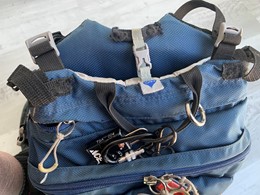
I may also attach extra carabiners, TSA lock, compass etc
2. Adjustable Top Mounted Straps:
PURPOSE: To quickly secure  & access various combinations of garments (jackets, vests, rain gear AND trekking poles.)
Image at right depicts the left-hand strap loop of 2 such loops with adjustable lock fittings that can securely tie-down varying combinations of jackets, vest, & trekking poles.
NOTE: I designed this MODIFICATION specifically for Camino de Santiago,
BUT it served well constantly afterward:
1) consumed less of day pack's interior space,
2) could easily carry (a) rain jacket & pants, (b) lite jacket & vest
for 'layering' flexibility,
3) securely store trekking poles when not in use.
4) quickly put-on/take-off garments to adapt to significant daily
temperature changes: cold dark early dusk TO mid-day heat.
Particularly useful as I climbed onto the colder, higher western plateau in October, (2,165 feet (660 metres).
3. Adjustable Shoulder straps & waist belt
Video includes entire harness: straps & waist belt
-- larger images below
.
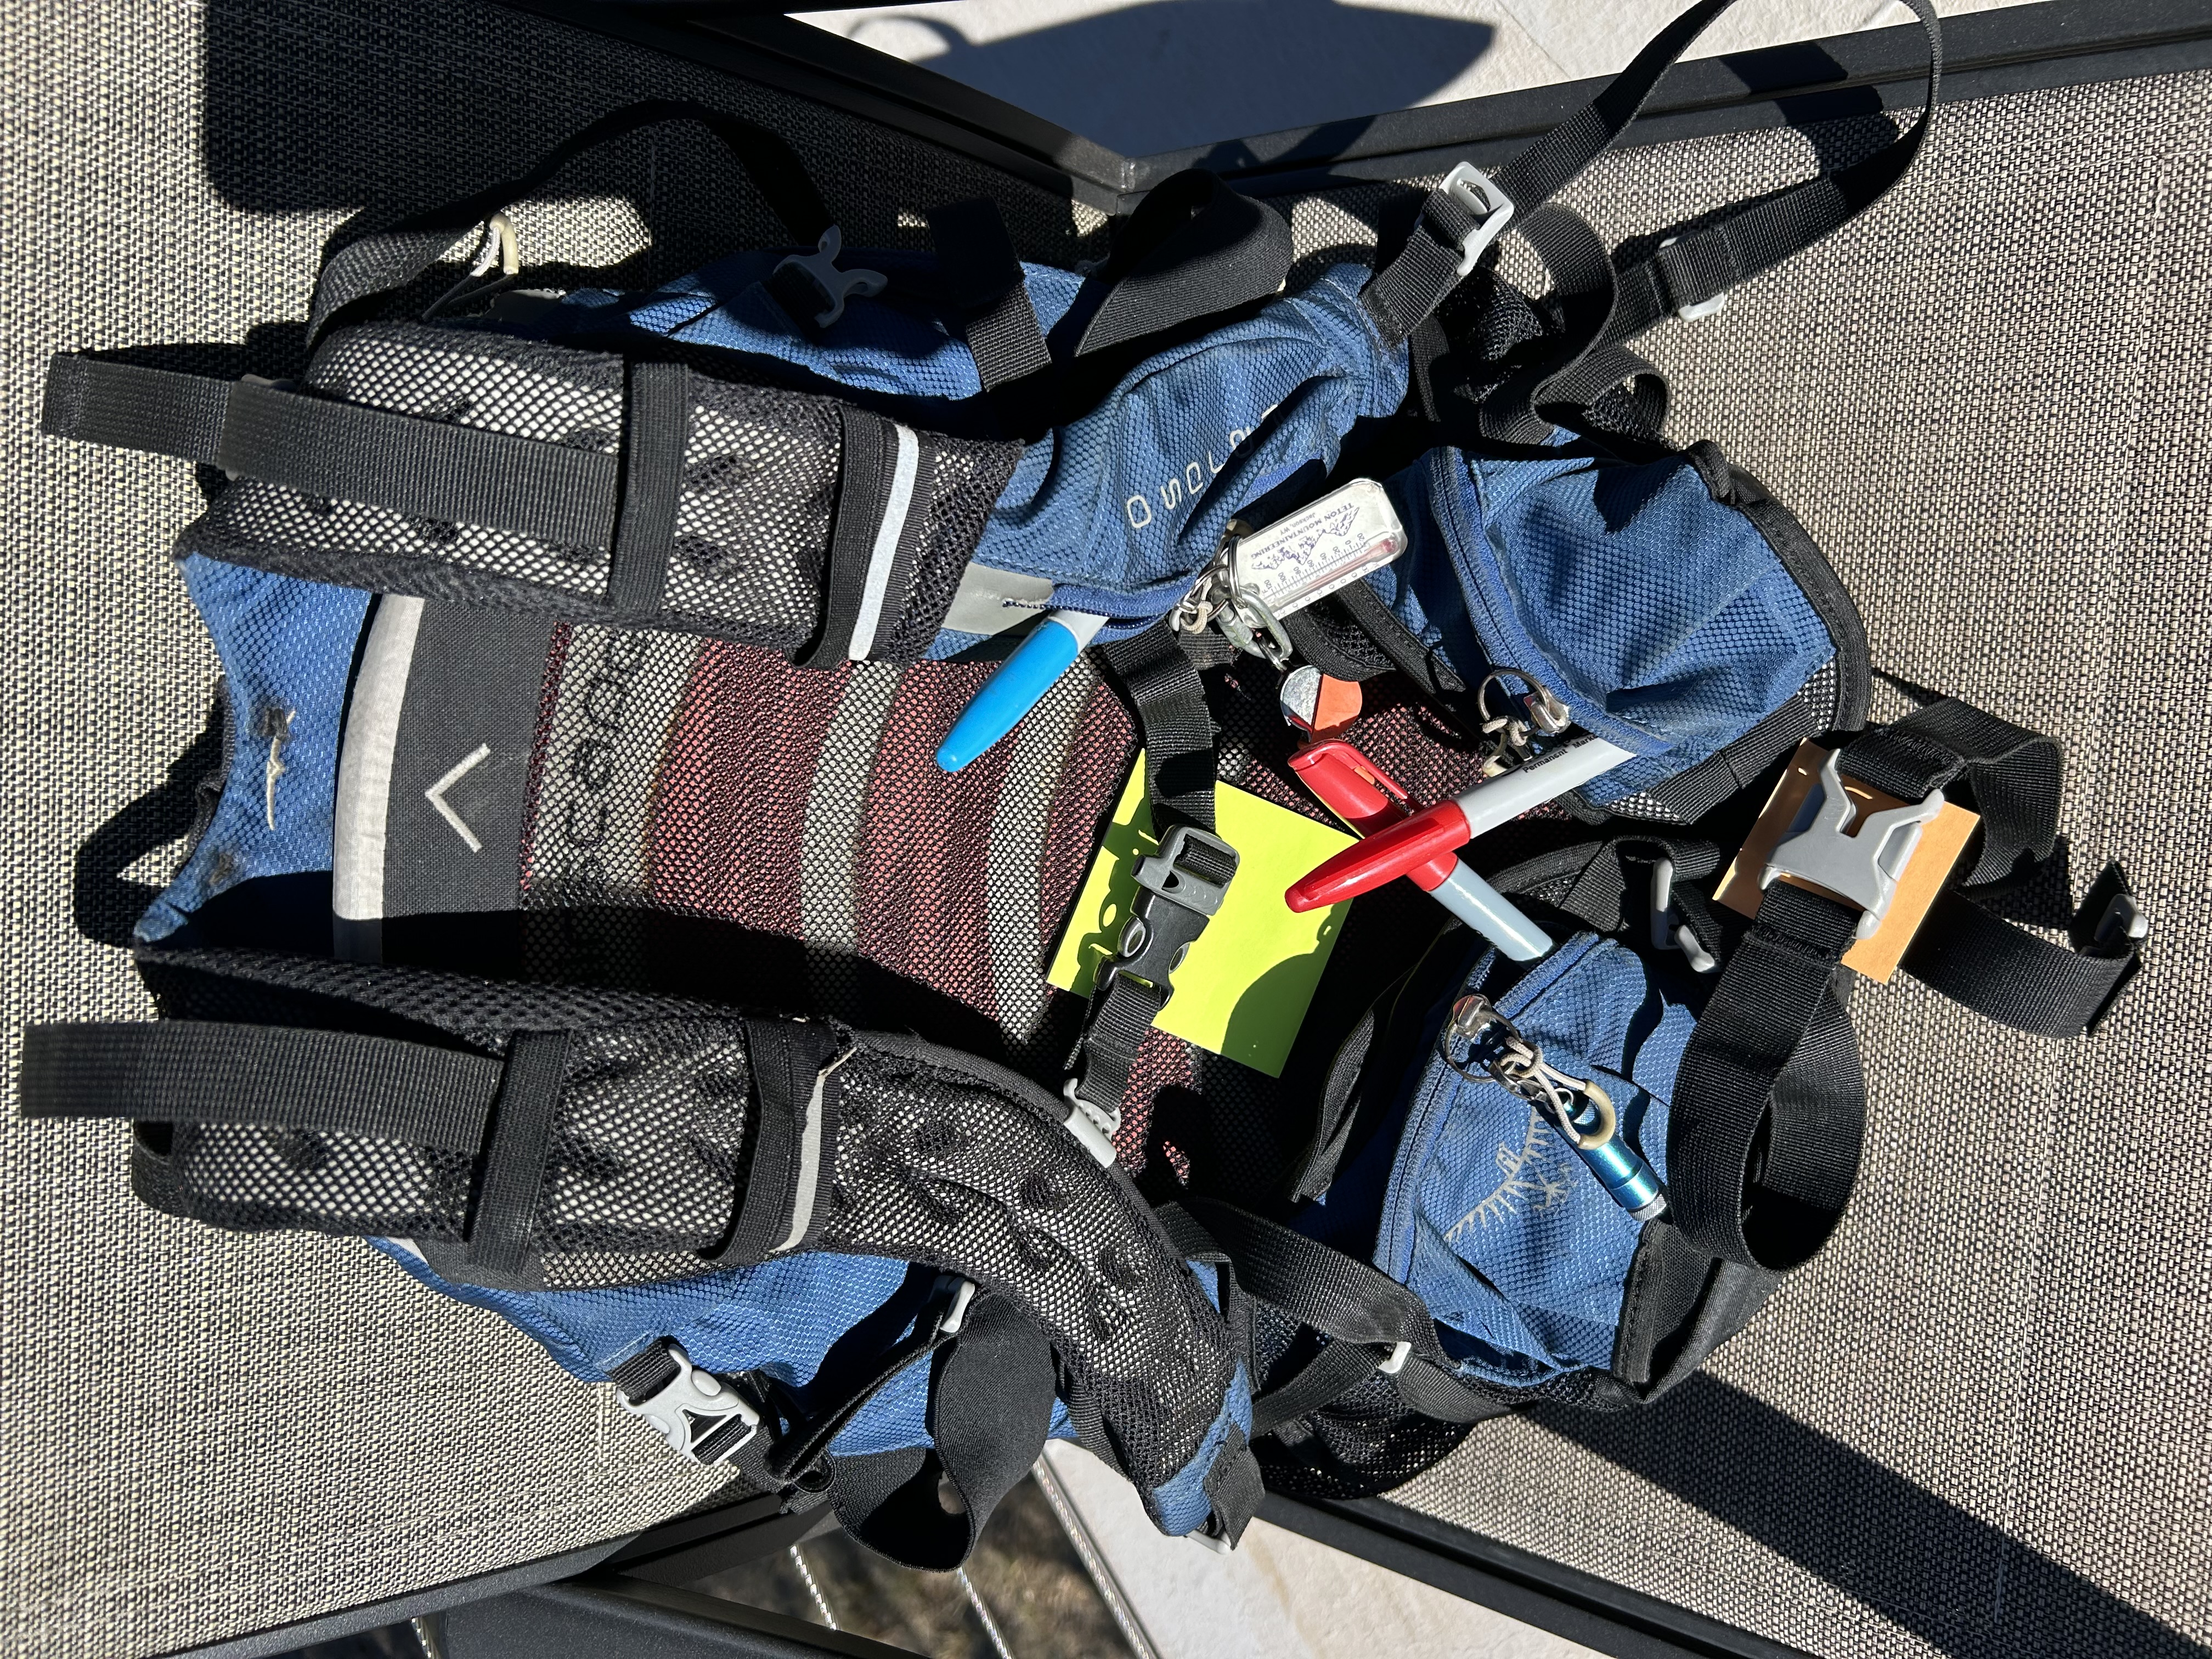
Purpose: shoulder harness is the core system of adjustable padded straps that:
1) spreads pack's load 'comfortably' on your shoulders,
2) transfers pack's weight to your upper body.
3) with adjustable chest strap & strap lock (aka sternum strap)
connecting both shoulder straps across your chest to:
(a) Prevents shoulder strap slipping & constant adjusting
on your shoulders, especially when moving.
(b) Stabilizes pack minimizing side-to-side shifting &
improving balance at fast pace on uneven terrain.
(c) Evenly spreads load to chest & shoulders reducing strain
& improving long distance comfort.
Note: right side of strap barely seen on bottom left side of closest shoulder strap in image.
4) with small zipper pouch on wide waist belt (barely at middle right)
My explanatory video short (not Steven Spielberg)
https://youtube.com/shorts/51zQMil8HnQ?si=NUZF8JhTaAh9pFO3
4. Thick waist belt:
Adjustable ... with buckle & small zippered pouches on each side of waist belt & on Left shoulder strap.
Subscribe!
Join my mailing list to get new content notifications.
