
Scott's Travel Wardrobe
quick links to main Travel Safety posts
I. Tilley Hat:
II. Sunglasses & lanyard:
III. T-Shirts:
IV. Jackets, Vests, & Dresses:
V. Pants-Shorts/Dresses-Skirts:
VI. Waist Money Belt:
VII. Waist Passport POUCH:
VIII. Socks:
IX. Hiking Boots:
Wardrobe Post Purpose
Purpose of this post is twofold:
1) to provide you with a detailed deep dive into my travel wardrobe I perfected over 20+ years of world travel on all continents and many countries, and ...
2) a detailed divulge of secret locations in my body’s wardrobe for hiding emergency cash from pickpockets, robbers, & even some lovers :-).
My wardrobe was important for safety and convenience.
Safety, because I traveled solo, speaking only English, walking & using local transport throughout large cities’s non-tourist neighborhoods & thru rural area's small remote villages. 
Convenience, because at 60 I required more luggage space than when younger:
1) my ‘necessaries’ required. (drugs, vitamins, reading glasses, & medical accessories,
2) committed to videoing everything, so I could relive those experiences when no longer able to travel (now), I carried backup video camera & accessories, & ...
3) rapidly varying climatic and weather conditions demanded that I sometimes carry lightweight, easy wash & dried clothing as well as a range of jackets from lightweight to heavier stormproof.
Finally, this wardrobe MUST fit ONLY in a moderate-sized rolling bag & a medium size daypack. On occasion, a 3-5 day overnight (OVN) with just the daypack. (think 30+ days Camino de Santiago 600 mile trek across Spain) PIK ROLLING & DP
Much of what I will discuss may not be required for your travel style, so please use &/or modify what is useful to you.
Safe Travels.
A travel hat gives you hidden money, shelter & disguise!
Tilley Hat:
I traveled N America & world for more than 25 years with a Tilley hat -- “ ‘old guy’ sweated & worn”; replaced twice under their lifetime warranty when I wore them out.
My Tilley hat with my designed cape protected my head and my face from even more damage than it had suffered in the prior 60 years.
Tilley has many hat styles etc, but my hats had several traits useful to me, the traveler: a) 'Bug-outs': (small screened ports for air ventilation without skeeter access), b) adjustable neck straps for high winds, and c) … secret $ compartment.
Tilley hats" (https://tilley.com/collections/best-brimmed-hats
A. Secret Compartment:
Tilley hat has a secret compartment on the inside under top of hat where I would store $20-$30 USD  or equivalent local currency.
IN PIK secret compartment entry is between large Tilley label & small owner’s name label beneath shown with a US $20 sticking out.
B. Neck strap against fierce winds, but also to carry hat securely whenever taken off.
ANECDOTE: France lost Tilley
Some evening on a quiet French village back street I sat on a cement stoop eating my ce cream cone. For comfort, I sat on my hat and then walked off without it … never to be seen again.
Safe Practice:
Now hat is ALWAYS either 1) on my head, 3) attached to my daypack with carabiner, or 3) secured to my wrist with neck strap wrapped around my wrist. PIK
C. MODIFICATION: Cape: PIKs: 1) closed against wind etc (worn),2) snaps
While Tilley now offers a hat with cape, I designed my own:
1. Made of a medium-weight material that would tend to hang rather than flutter in a light breeze,
2. Initially attached with velcro, I ultimately had it sewn directly onto inside of headband. Material was light enough to stuff inside hat when not needed.
3. Finally I added a stainless steel snap fitting so I could snap cape closed around my face like a mask against moskies, flying dust & pelting rain.
My reflective curved sunglasses with my jury-rigged, heavy duty polypro lanyard permanently glued to them. PIK
A. MODIFICATION: lanyard
While lanyards for glasses exist, when they broke they were useless & hard to field-repair. So, I evolved my own repaired in hostel room.
Materials Needed: PIK of cord/tubing
1. Nylon paracord of desired length or several different use lengths,
2. Heat shrink tubing: Normally used to insulate spliced wires. Diameter: just large enough to slide over end of sunglasses’ arms & ends of paracord.
TIP: If cord is so thin that heat tube will not compress on it when heated: then, carry small diameter heat tubing to increase cord diameter before installing main tubing so main heat tube will compress over it.
3. I carried sufficient cord & heat tubing AND matches to make field repairs quickly & easily. Also carried a backup lanyard.
ANECDOTE: Yukon kayak
When kayaking any river or windy body of water ... everything should be attached to kayak: either in it, under deck shock cords or by a paddle lanyard connected to kayak.
If my kayak tipped over on the Yukon I could probably stay with & hang on to the kayak, but my paddle might easily slip away in the current. Always be attached to the important stuff. Think about it.
Simple T-shirt or blouse (for women?) is basic in hottest climates & foundational all else. Synthetic, easy to wash, quick to dry overnight, and no iron minimizes quantity to 2, 3 max. Easy to wash & dry every night to dry hanging anywhere close to dry.
Usually I hung on the end opf the bed or from the springs of the bunk bed above me. If T-shirt or socks didn’t dry overnight on the Camino de Satiago trek, I simply straped them to my day pak and they dried while walking.
Such T-shirt or blouse epitomizes efficient travel. It ain’t a fashion show. Most people you encounter for a few moments you will never see again.
My jackets & vests (I left my dresses home.:-) were varied from light weight rain windproof (Venice’s drizzel) to heavyweight, rain & wind proof against southern Argentina & Chile's Magellan Strait's storms.
The Clothing Arts heavy ‘security’ rain jacket had many large small zippered pockets PIKs accessible from either inside/outside or both.
Additional security was provided by tiny plastic locks PIKs on each inside pocket adding even more anti-pickpocket security to each interior pocket in addition to pocket zippers.
A. MODIFICATIONs:
1. Cash ‘money pocket’: All jackets: In each jacket I installed a ‘money pocket’ under inside left armpit, so I could easily reach money with my right hand. (PIKs 4-Jkts: both jkts: INT; no bill & w/bill).
DESIGN: Pocket opening should be 3" wide & 3 1/2" deep (NOT including seam material)... to hide US bills when folded in half cuz,
a. easier to store & recover money,
b. accommodates most foreign bills which are usually equal or smaller than US bills; very large bills could be folded in 1/3s.
TIPs:
TIP 1: Tried slightly stretchy pocket material but not that useful.
TIP 2: I didn't install velcro closure cuz: 1) inhibits access to money, & 2) money is secured by your arm against your body, IMO
TIP 3: use same color thread as jacket so pickpocket can't easily detect outline of pocket. PIKS 1) Light jacket: a) EXT view of pocket seams,
2. Heavy jacket:
I installed a large “rain pants pocket” inside back of my 'Clothing Arts' jacket so that I would not have to stuff rain pants in a pocket or carry a daypack.
Design:
Designed to securely hide & carry my rolled-up rain pants, pair of gloves, and occasionally, other small stuff.
Even when jacket rolled up with sleeves tied around my waist, rain pants in rain pocket just hangs down bouncing gently in small of my back BUT most importantly, reduces need for a daypack
HOW TO:
a) Roll up rain pants into a long, thin roll the width of your back.
b) Test its Size & Position:
1) Test pouch size with rain pants, gloves, etc, then …
2) Make a complete pouch that snuggly holds rain pants, gloves, etc.
3) Attach velcro fastener tabs on closing flap to secure contents.
c) Test location on jacket that will be most comfortable on your back. Best, I found, was at small of my back (made nice lumbar cushion when sitting).
2 PIKs: 1) Heavy rain 'Clothing Arts' jacket: 1) INT view of armpit pocket) & including large rain pants pocket, 2) rain pocket closeup: w/ rolled rain pants to hold gloves etc.
(PIKs: 1) Heavy rain 'Clothing Arts' jacket:
a) EXT (include view of armit pocket)
b) INT left armpit money bill pocket including large rain pants pocket,
c) rain pocket closeup: is larger than rolled rain pants to hold gloves etc.
3. Jacket's skirt tightening cord ‘anchor’ (PIK)
Jacket has a tightening cord loop on both sides used to tightened jacket’s bottom edge against your torso during wicked weather.
Unfortunately, when not in use, loops can hang down and catch on bushes.
SOLUTION: (1 PIK)
I attached a simple button above out-stretched ‘tightening cord’ inside jacket that I could loop around my button and secure it with its own cord lock. [JLK: shoe cord locks]
Lightweight, easily maintained & durable ...
Pants-Shorts-Dresses-Skirts:
I travel with only 2 pair of cargo shorts & 2 pair of cargo long pants. Each I’ve modified to hold/hide currency bills & my cell phone when in public.
MODIFICATIONs:
1. Cellphone pocket:
a) A hidden ‘cell phone pocket’ was installed inside my travel shorts/pants on left side of crotch.
Note: Shorts are inside-out, so, in image at right:
1) Left side shows right side 'cell phone pocket'.
2) While right side PIK displays 'hidden money' pocket with US bill sticking out of pocket.
3) Also, notice lanyard of cell phone.
Depending upon dimensions of your cell phone with or without cell phone case, cell phone should fit easily in pocket so easy to retrieve by loosening your pants’ belt & sliding your hand down inside your shorts. 
TIP 1: I attach a lanyard from the phone case to a smallloop (white, center left) sewn onto the inside of waistband of my shorts/pants so well securing the cell that even if it ' escaped' my secret pocket for some reason, I would not lose it. Paranoid? Yup!
1) Photo below-right has 1 type of cell phone lanyard whose left end attaches to white loop in above left image.

TIP 2:
a. Lightly ‘tack’ pocket in place & test its ease-of-use before your final sew-in.
Goldilocks: “Not too tight, not too loose — just right.”
b. Small loop material on inside of waistband is narrow cord or shoe lace VERY SECURELY sewn-in.
2. Money Pocket: (see above right image of RED money pocket)
The hidden 'Money Pocket' installed on right side of crotch is 3” wide x 3¼” deep, as described above in: [JLK 'b. Jackets/Vest/ Dress/Skirts”] so, ONLY I could reach them by loosening my belt and reaching down inside my shorts/pants OR you lifting your skirt, etc …. perhaps in a restaurant’s restroom.
TIPS:
a. ‘Pocket’ material should be lightweight, but strong & sewn-in with an equally strong thread.
b. Thread color should match the shorts/pant’s exterior color so will not visibly contrast for the observant pickpocket.
Note: seam's partial red thread which could give away pocket & its location.
A Travel belt with hidden zippered pocket:
Is a belt with a long zipper running much of belt’s length on back that secures a tight narrow pocket. I carried 2 different items in that pocket —-
A. Currency bills:
I carried a two US $100s & a two large denomination local currency bills.
Simply play with folding the bills length-wise until they will fit inside & close without too much bulk
B. Tiny 'info-slip' summary of credit/debit card numbers
I seldom use credit/debit cards except for online transactions (e.g.: Amazon, etc), so I do not remember Card & PIN #’s.
OTOH, I carried 2 pair of cc/dc, each from 2 different banks for emergencies or when cash was not an option e.g online train, some hostels & flight bookings.
So, I prepared & laminated several tiny 'info-slip' & hid them in key locations on my person & in my luggage.
I laminated them to prevent damage when hidden in my shoes under the insert sole.
NOTE: The above info slip hides all but the last 4 digits of card's number, but 1 such info slip DID have all numbers & was hid in most secure location -- under left shoe's sole insert. (OMG, this guy is paranoid. Yup!)
Security Travel Pouch for Passport, cash and CC/DC:
I have carried Rick Steve’s Essential Silk Moneybelt for 18 years --- with my modifications.
When I carry my passport it is ALWAYS in my waist passort pouch hidden under my pants. I wear my money/passport belt whenever I am traveling between countries OR base cities (think: Madrid to Barcelona) or anytime I sense passport rules might be strict.
Some countries have random immigration inspections. Many hostels, particularly in quasi-totalitarian countries, are required to photocopy your passport … some actually taking it overnight or until you depart.
NOTE: that means in some places your passport copy is all you have on walkabouts, etc.
I always carry a copy of my passport whenever I am not carrying the security pouch & its actual passport. Also, my iPhone has a copy.
Some country’s nationally important historical sites require a Passport for entry, although I have often shown just my photocopy. Totalitarian countries (Myanmar) may require your actual PP.
Often such travel pouches have a few pockets for your Passport, money, CC/DCs. Some even offer RFID blocking & theft reimbursement insurance, lost & found tags & (now) belt loops.
This IMAGE above AND the description below is of Rick Steve’s 20-year-old Essential Silk Moneybelt ONLY. Rick's newer designs are different ... seemingly with fewer features. That's too bad.
A. Front Pocket: ($20 US bill sticking out)
When traveling I use the front pocket for:---
1. Host country’s currency, immediately available for
a. Airport arrival expenses (bus, food, etc),
b. To avoid high currency exchange rates at airport,
c. To pay my hostel.
2. 2 pair of earplugs (cone-shaped foam) & 2-3 Imodium pills (diarrhea),… just in case. Ear plugs reduce the agony of a child’s hour-long scream sessions during flight and rude, inconsiderate hostel snorers.
B. Longer Rear pocket: (Passport seen at right, Visa CC @ left)
This compartment has 3 sub-compartments.
1. A mesh Passport pocket on rear compartment’s right rear wall in which I keep ONLY my passport. (Passport is partially in pocket)
2. A credit card pocket mounted on the rear left ... of rear compartment wall. It also contains Imodium (diarrhea) pills & an emergency mini-thumb drive that backs up all my trip documents including itineraries, & site-specific .pdf's.
3. Full length front sub-compartment: (between inside front of rear compartment & Passport & credit/debit card pouches)
In this compartment I store important papers: passport copy, Lost Luggage, etc) [pplk: sub-post: Resources: Docs].
C. Zipper pull: (see small blue flashlight at upper left of PIK):
I attach a tiny, but very bright flashlight on rear compartments' zipper pull. Easy to reach into pants & pull up far enough to see around or read a ticket on bus.
D. MODIFICATIONS:
1. Redundant waist belt protection:
My money belt has a stretchy waist strap that over time stretches and must be tightened.
The belt includes a (beige) plastic locking buckle that allows easy on & off. (directly left of shiny round snap ..top)
I feared the belt would stretch too far or the buckle would break or I might not close it properly — causing me to lose entire pouch & Passport. I wanted greater peace of mind.
So, I bridged the plastic latch by installing 1/2 of stainless snap fitting to the belt on each side of the buckle. Thus, a redundant safeguard, JUST IN CASE.
(Note: in PIK above shiny round top of metal snap is attached to end of waist strap and 'snaps' onto bottom snap fitting ... which is installed on small strap attached to pouch. (lower snap fitting not visible in PIK)
2. 2 Belt Loops:
I installed 2 belt loops at the top of the pouch. When snaking belt thru pant's loops include these 2 loops so pouch is secured to your body with pant's belt & pants …. independent of the elastic waist strap … THUS two independent systems.
Paranoia? Yup
The loops are not only long enough for your pant’s belt, they are somewhat longer than necessary so pouch will hang below the top of the pants -- well hidden.
This modification prevents me from losing the pouch 1) if the belt breaks, 2) comes apart or 3) I fail to put the pouch on correctly as I did on one pre-dawn, dark Camino de Santiago walk.
3) Credit/Debit card mini-pocket: Installed 2 sets of small velcro tabs to insure pocket stayed closed.
TIP 1: How to access money pouch when wearing it on pants belt?
With pouch installed thru pouch loops onto belt with pouch inside pants, of course, but also facing outward and almost impossible to access pouch's compartments.
To access: I loosen my pant’s belt enough to rotate pouch towards me up & out of my pants … until it rests flat against my outside pant’s front … with compartments NOW accessible.
E. LOST Passport Consequences:
This all may sound paranoid & overkill, but remember, losing your passport in many countries prevents you from leaving that country or entering the US until you have obtained a new passport.
When lost, nearest US Embassy Consular will guide your passport replacement.
TIP: I always carried extra passport photos & passport copies, driver’s license copy, etc.
ANECDOTE 1: Quito, hostel’s young man
In my hostel a young American man either lost or had his passport stolen while site seeing. I don't know how he resolved it but I know it took him several days of anguish & scurrying about with American Embassy. Several wasted days.
ANECDOTE 2: Argentina
2 days after arrival in Argentina I took a boat tour while wearing my money belt containing my brand new US Passport under some falls. It could never be successfully scanned again by TSA & Customs requiring, manual info input. Stuff happens, but not twice. 😄
Safe Practice:
Except when traveling between countries or long distance between cities, leave passport in hostel safe or well hidden in hostel. Always carry 1 or more Passport copies at all times. I have never had copy rejected in non-Customs situations like national museums.
TIPS:
1. Wise to carry ALL credit & debit cards, most money & passport in the same device? It is not?
2. Comfort? Imagine a pouch worn beneath your blouse across your stomach or in the angle of your stomach & pelvis while sitting on a long plane ride? Or, a long-distance Asian bus with no A/C? Feel it sticking to your skin?
F. "Snatch n' Grab" Danger of OTHER styles of Security Pouches:
A'snatch n' grab' is a sudden & forcible grasp to steal something: i.e cell phones, shoulder purse, & 'around-the-neck' pouch.
Fundamentally, a VISIBLE "travel pouch", fashion pouch, purse, day pack etc IS equivalent of a red & white bullseye on your body advertising ‘valuables; ... AND potentially dangerous, IMO. 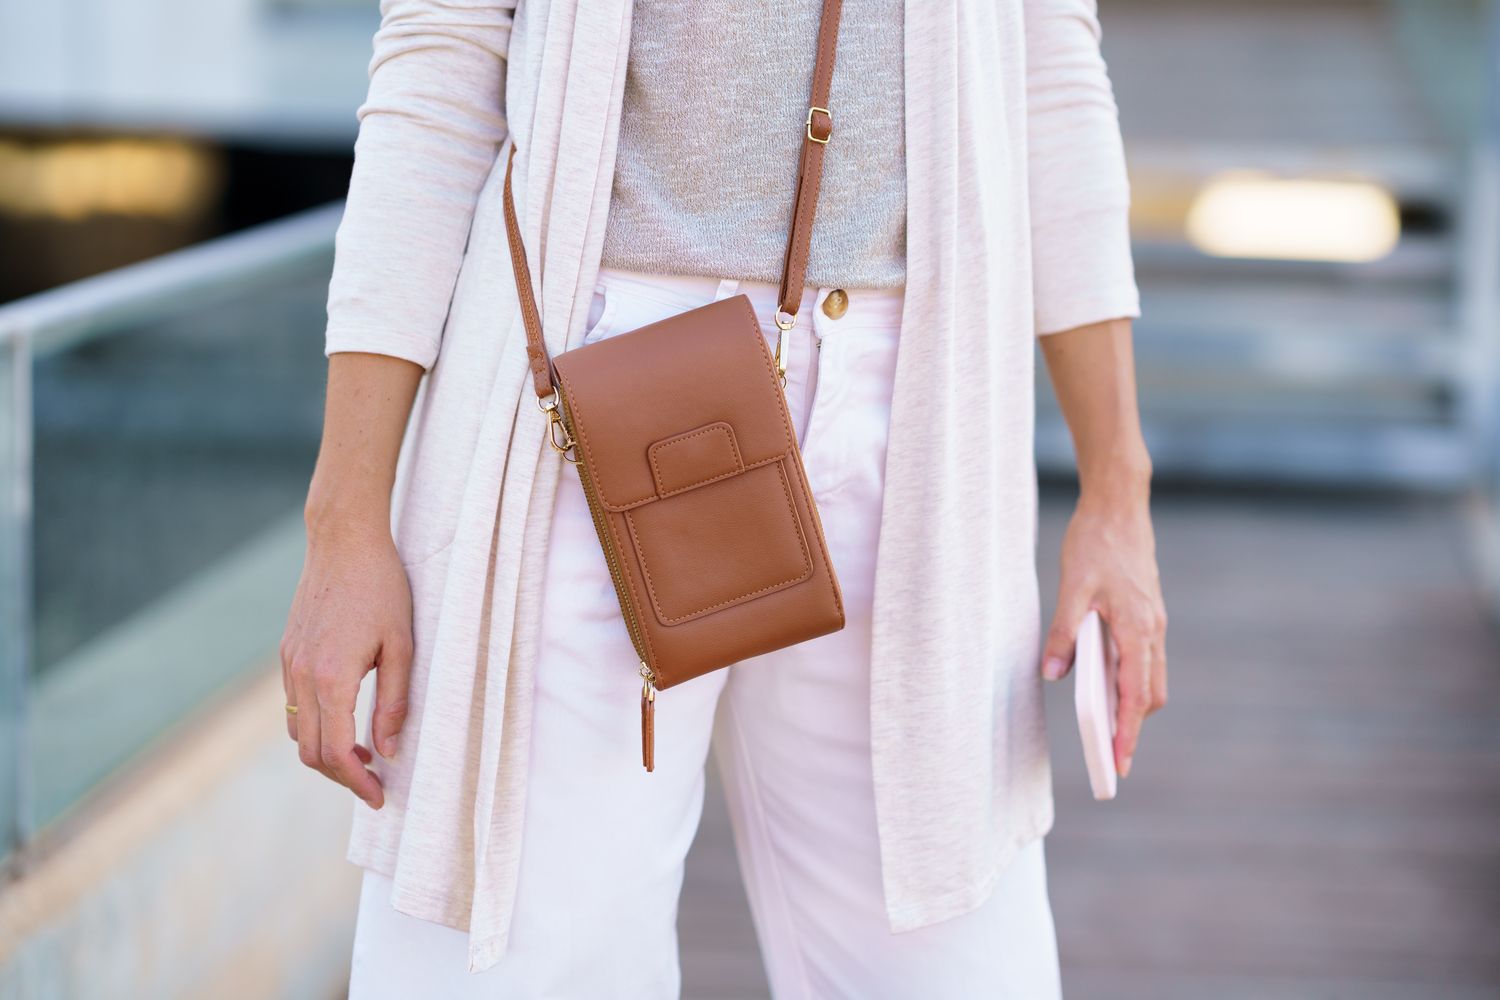
1. “Hanging on the neck’ pouchs,
Often called a “wallet”, it may be OK IF neck strap AND pouch are securely hidden beneath tight fitting shirt, sweater, jacket etc, & would therefore be extremely difficult for a thief to easily detect & quickly remove.
But some tourists wear a travel pouch boldly visible, dangling from their neck, bouncing loosely on their chest for all the world to see like a “super cool tourist’s” Great Badge of Travel instead of the mark of a ‘fool.’
You are not a fool because fools don’t read this post.
A skilled, strap-slashing, thief deftly grabs your pouch, while
, while simultaneously slicing
thru its neck strap with a razor-sharp box cutter knife & races off into the crowd.
Hopefully, with little physical damage to you.
Consider, for a moment, a razor-sharp knife flashing, slashing around your face, neck & torso until the thief frantically escapes into the surrounding crowd. IN auto-response, your hands & arms fly up in defense into the mele's midst.
2. “non-slashable strap” pouch:
The “non-slashable strap’ seems extra safe because a snatch & grab thief can’t CUT thru galvanized or stainless steel airline cable, NOR will cable break if pulled hard by a fast traveling ‘snatch & grab’ thief on a bike.
But what if thief panics when razor knife cannot slice thru your pouch’s strap?
BUT, ... in desperate frustration, will she try slashing a few more times until she realizes a metal cable hidden is inside strap and abandons her attack?
Will her additional slashes be less accurate?
Do you really want this now desperate thief to be making increasingly less accurate & futile slashes at your strap with a razor blade near your face, neck & torso? Will you automatically raise your hands & arms up, thus putting them in danger? Probably not.
Is your boldly exposed tourist pouch’s supposed bragging rights worth the risk? Your call, of course.
3. “non-slashable” pouch panels:
While “Non-slash body panels” may also ‘seem’ useful, less risky to you, may I suggest a different analysis:
1. Why would a thief spend time slashing at a pouch’s panel on your chest if he already wasted time on the 'unslashable ' strap
2) How many slices are required to get inside?
3) How much more time required to find & search individual pockets for valuables?
4) Riskier escape? IMO, makes little sense.
If thief was foiled by your ‘un-slashable pouch strap’, 1) he may assume you are aware & protecting against his knife, 2) may professionally be aware of your “unslashable panels” (“You can learn anything off the Internet.”, Elon Musk), and finally, she knows extra effort/time not worth the added risk of being caught.
But if thief ignores that logic, do you really want this increasingly frustrated & anxious thief to be slashing at pouch resting on your chest beneath your face & neck until…. she realizes its is futile?
Not I, and I hope NOT you!
3. “snatch & grab” thief on bicycle:
Imagine the force of a human on a fast-moving bicycle racing past you at the moment he reaches out & grabs the pouch hanging off your neck.
If skilled, it will fly off & over your head or strap will break with little serious damage to you.
If not skilled enough and strap does not break, will strap catch under your chin? Consider what will happen to you, your chin, your neck, your nose, etc?
Am I trying to scare you? Of course, I am. This is dangerous albeit rare stuff.
DISCLAIMER: I am being vivid & straightforward forward NOT because 1) I enjoy frightening you, or 2) I make money off other pouches (This blog/post makes no attempt to make money), but rather, 3) because the sole purpose of my blog’s safety posts is to make your travel safer by showing you possible dangers you may avoid with Safe Practices.
You ultimately make the final decision.
Quality hiking socks promote foot's health, comfort & performance.
Benefits are moisture-wicking for temperature control & dry feet, cushioning, minimal boot/foot friction, support & blister/chafing AND adaptability to weather & terrain variations.
minimize friction between your hiking boot and your foot.
Sitio©:https://www.atscottstravels.com.w1.sdw.dev/Umbraco/#/content/content/edit/2901
I have worn Darn Tough Hiker Micro Crew Cushion Socks for the last 23 years because: 1) tight-fitting after every wash & only slightly less so after a day or 2 of use, 2) the natural colors complemented my boots without attracting attention, and most important, was their ‘lifetime warranty.’
While I did wear out several individual socks, I did not seek replacement because I had used them so much & so hard. They were a bargain.
Today, a quick Amazon search reveals a dozen or more manufacturers probably with equally great claims & a beautiful color schemes for the fashion conscious. I won't attempt to dissect their claims and select a winner. Out of habit I'll just keep ordering Darn Tough socks. 😃.
FYI:
Gear Lab’s review: https://www.outdoorgearlab.com/topics/shoes-and-boots/best-hiking-socks
Switch Back Travel: https://www.switchbacktravel.com/best-hiking-socks
NOTE: Both the above reviews have Darn Tough at the top.
I have worn a durable, low profile hiking boot for physical work & travel for past 30 years, except when dancing or funerals. Even tho my age (75) exempts me, TSA still makes me take off my well-used, disgusting hiking boots anyway.😀
A. Quality Hiking Shoes:
I travel with ONLY 1 pair of hiking boots & a cheap pair of sandals ($1-2 in Asia) for daily showers & hostel lounging. I don’t do fashion.
Most quality hiking boots today come with a very cheap insole insert with little arch support that I replace with a higher quality insole at same time I buy the boots.
Consider, your body’s full weight constantly pounds on your complex foot bone & muscle system.
Protect your feet. Good supportive shoes & insoles are, IMO, a must as you get older.
OTOH, I will not pose as a hiking shoe expert on specific brands.
Others, including online sources, are more current and better qualified than I to parse the near-infinite types, styles, and specialty uses of today’s outdoor shoes.
YOU must do your own research.
CAUTION: DON'T rely on your local big box store shoe salesperson whose primary purpose is to SELL you shoes. They may know very little about feet & shoes except that they have both. 😄
ANECDOTES 1: Sedona Canyon woman hiker:
High on a steep trail in Sedona Canyon, Arizona I met a mid-age woman on the trail agonizing over her recently purchased shoes from a big box store sold by someone who indicated they knew nothing about hiking shoes, but “would be happy to help.”
Safe Practice: Find the Expert:
Gracious as that salesperson’s offer may sound, that offer probably is not to your benefit. You want an expert who knows hiking shoes & hiking feet.
1. I do my due diligence, online research first.
2. Then, In best (?) available sporting goods store, I will “politely” ask for the “most knowledgeable person” on the kind of product I want to buy.
EXAMPLE: “WADR, who is most knowledgeable on trekking poles.”
3. DON'T be intimidated by their presumed sense of insult. On your choice of hiking boots depends hundreds of miles of pain-free comfortable hiking.

You wouldn’t take the 1st knee replacement surgeon nor dentist listed in Linkedin either.
Not all are equally skilled.
ANECDOTE 2: Tucson hiking shoe saleswoman.
I can’t tell you how many expensive, poor-fitting hiking shoes I bought until I met a shoe saleswoman at a Tucson sporting goods store who, I eventually learned, “Really knew hiking shoes.”
Buying shoes from her 1st time took 1½ hours. She measured my feet, watched me walk up & down an incline slope, queried my hiking & travel habits etc & tested several different shoes … all the while ... educating me on the finer points so I would appreciate the shoes I was buying.
I never bought hiking boots from another, until she quit, & now drives semi-trucks. “Go K_____”😃
Your shoe quality is as important as the tires on your car.
B. Hiking Shoe Laces:
Hiking boots, in my experience, come with varying quality shoe laces, in my experience: sturdy or cheap, slippery or gripping. Evolving shoe design seemed to have solved some of these issues.
I, OTOH, had a unique issue to solve—PIK Asian Temples, homes & some businesses do NOT allow shoes inside. Often, I was taking my shoes on & off all day walking from temple to temple.
Safe Practice:
1. Replace shoe laces with shock (stretchy) cord and cord locks.
2. HOW TO:
a. Buy same length of stretch cord as your shoe laces. (You will cut excess off later)
b. Both cord ends should 1) fit snuggly--together— thru shoe’s lace eyelets & 2) thru Cord Locks.
3. Lace thru all shoe eyelets as normally done —- tightening moderately as you go.
4. Install cord locks over both cord ends.
NOTE: REI sells: “ Gear Aid’s “Ellipse Toggle Cord Locks” & SP.iD’s round adjustable cord lock.
5. Tighten cords until your foot feels comfortable for normal daily use and /or for easy on/off at temple visits. 😃
TIP: Before hikes, tighten cords as much as possible for tighter shoe fit on steep, uneven trails.
C. HIDDEN MONEY etc. PIK
A thin pak of folded money is perfectly hidden beneath these insole inserts.
HOW TO:
1. Fold the bills so they are as thin & wide as possible. Done right, you will not ‘feel’ the money pak
2. Place bills in a small plastic small sealable plastic baggie or Glad Press n’ Seal© wrap.
ANECDOTE:
In a Xian, China bank I tried to convert a small pack of unwrapped US $100’s that had been hidden under my shoe insert for weeks of walking & hiking. They were admittedly ‘gamey.” They refused to accept. Fortunately, nearby Bank of China was not so fussy.
TIP: I also carried a duplicate tiny, encapsulated CC/DC info card under the other shoe’s insert. PIK
Table of Contents
quick links to main Travel Safety posts
I. Tilley Hat:
II. Sunglasses & lanyard:
III. T-Shirts:
IV. Jackets, Vests, & Dresses:
V. Pants/Shorts/Dresses/Skirts:
VI. Waist belt:
VII. Waist Passport POUCH:
VIII. Socks:
IX. Shoes/Hiking Boots:
Wardrobe Post Purpose
Purpose of this post is twofold: 1) to provide you with a detailed deep dive into a wardrobe I perfected over 20+ years of world travel on all continents and many countries. and 2) a detailed reveal of secret locations on my body’s wardrobe for hiding emergency cash hidden from pickpockets, robbers and untrust wortthy lovers :-).
My wardrobe was important for of safety and convenience.
Safety, because I traveled solo, speaking only English, walking & using local transport throughout large cities’s non-tourist neigghborhoods to small remote villages.
Convenience, because at 60 I required more luggage space than when younger: 1) my ‘necessaries’ required. (drugs, vitamins, reading glasses, & medical accessories, 2) committed to videoing everything, so I could relive those experiences when no longer able to travel (now), I carried backup video camera & accessories, & 3) rapidly varying climatic and weather conditions demanded that I sometimes carry lightweight, easily wash & dried clothing as well as a range of jackets from light weight to heavier storm proof.
Finally, this wardrobe MUST fit ONLY in a moderate sized rolling bag & a medium daypack. On ocassion, a 3-5 day overnight (OVN) with just the daypak. (think 30+ days Camino de Santiago 600 mile trek across Spain. trips easy to maintain clean and dry and could include multiple trips with a Day Pack online
Much of what I will discuss may not be required for your travel, so please use &/or modify what is useful to you.
Safe Travels.
Subscribe!
Join my mailing list to get new content notifications.